
时间轴
时间轴
2025-01-10
init
本文介绍了在Linux下基于edk2搭建UEFI开发环境的方法,包括下载edk2源码、安装编译工具,并通过HelloWorld示例演示了编写DSC、INF和C代码,编译生成x64及aarch64平台的目标文件,以及在Emulator和QEMU中运行和用gdb调试的流程。文章还展示了HelloStd示例,说明如何在UEFI中调用标准C库。
基本环境搭建
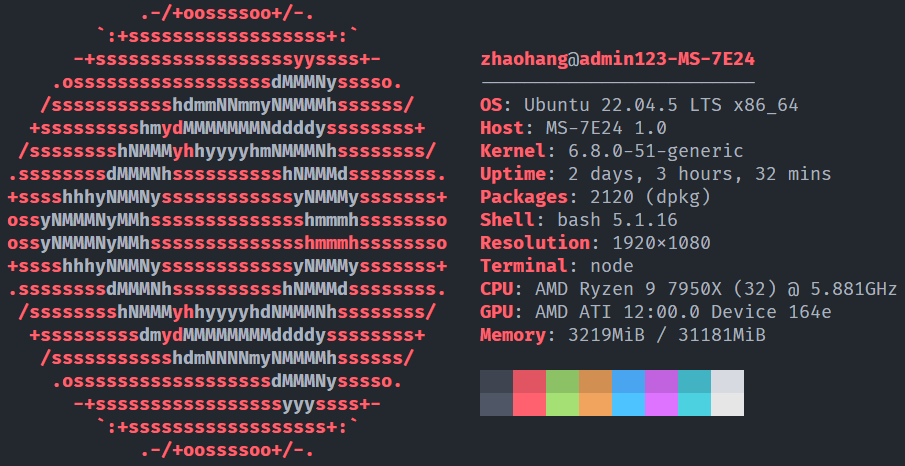
这是我的硬件环境及操作系统
下载 edk2 源码
123456789101112131415161718 | # 安装需要的软件包sudo apt updatesudo apt install gitmkdir -p ~/UEFIcd UEFIgit clone "https://github.com/tianocore/edk2.git"cd edk2# 使用这个分支git checkout origin/stable/202408git submodule update --init --recursivegit branch# 查看子模块是否都已正确初始化,如果子模块未下载完毕,编译时会有一些问题git submodule statuscd -# 下载edk2-libc的代码,这个主要是为了在UEFI开发中使用c标准库git clone https://github.com/tianocore/edk2-libc.git# 创建code文件夹用于存放我们自己的代码mkdir -p code |
安装编译工具
12345678 | # 下载一些基本软件包sudo apt-get install python3 python3-distutils uuid-dev build-essential bison flex nasm acpica-tools gcc# 安装arm的编译器, 这里主要是为了编译aarch64的mkdir -p ~/UEFI/toolchaincd ~/UEFI/toolchainwget https://developer.arm.com/-/media/Files/downloads/gnu-a/8.2-2019.01/gcc-arm-8.2-2019.01-x86_64-aarch64-elf.tar.xztar -xf gcc-arm-8.2-2019.01-x86_64-aarch64-elf.tar.xzcd - |
HelloWorld
下面通过一个 HelloWorld 的例子来实现编译 UEFI 代码到目标平台为 x64 或 aarch64,并支持在 Emulator 和 qemu 中运行,最后用 gdb 调试程序
代码
12345 | touch HelloWorld.dsctouch HelloWorld.inftouch HelloWorld.c# 这个命令行工具可以生成uuid, 后面的dsc和inf中的uuid都是这样生成的uuidgen |
HelloWorld.dsc
DSC 文件是包描述文件,其中Defines中的所有字段都是强制性的。
对于 LibraryClasses 中的路径可以通过以下命令查找
12345 | cd edk2# 以UefiApplicationEntryPoint为例grep UefiApplicationEntryPoint -r ./ --include=*.inf | grep LIBRARY_CLASS# 通过GUID查找grep -i 752F3136 -r ./ --exclude-dir=Build |
LibraryClasses 的格式是
1 | LibraryClassName|Path/To/LibInstanceName.inf |
对于 DSC 文件的完整解释,参考以下链接:

1234567891011121314151617181920212223242526272829303132333435363738 | [Defines] DSC_SPECIFICATION = 0x0001001A PLATFORM_GUID = c08977d4-6e87-42f6-bf5c-4d41cfe7ba53 PLATFORM_VERSION = 0.01 PLATFORM_NAME = HelloWorld SKUID_IDENTIFIER = DEFAULT SUPPORTED_ARCHITECTURES = AARCH64|X64 BUILD_TARGETS = DEBUG|RELEASE|NOOPT OUTPUT_DIRECTORY = $(PKG_OUTPUT_DIR)[LibraryClasses] BaseLib|MdePkg/Library/BaseLib/BaseLib.inf BaseMemoryLib|MdePkg/Library/BaseMemoryLib/BaseMemoryLib.inf DevicePathLib|MdePkg/Library/UefiDevicePathLib/UefiDevicePathLib.inf MemoryAllocationLib|MdePkg/Library/UefiMemoryAllocationLib/UefiMemoryAllocationLib.inf PrintLib|MdePkg/Library/BasePrintLib/BasePrintLib.inf UefiLib|MdePkg/Library/UefiLib/UefiLib.inf UefiHiiServicesLib|MdeModulePkg/Library/UefiHiiServicesLib/UefiHiiServicesLib.inf ShellCEntryLib|ShellPkg/Library/UefiShellCEntryLib/UefiShellCEntryLib.inf HiiLib|MdeModulePkg/Library/UefiHiiLib/UefiHiiLib.inf UefiApplicationEntryPoint|MdePkg/Library/UefiApplicationEntryPoint/UefiApplicationEntryPoint.inf UefiBootServicesTableLib|MdePkg/Library/UefiBootServicesTableLib/UefiBootServicesTableLib.inf UefiRuntimeServicesTableLib|MdePkg/Library/UefiRuntimeServicesTableLib/UefiRuntimeServicesTableLib.inf DebugLib|MdePkg/Library/BaseDebugLibNull/BaseDebugLibNull.inf PcdLib|MdePkg/Library/BasePcdLibNull/BasePcdLibNull.inf[LibraryClasses.ARM,LibraryClasses.AARCH64] NULL|ArmPkg/Library/CompilerIntrinsicsLib/CompilerIntrinsicsLib.inf NULL|MdePkg/Library/BaseStackCheckLib/BaseStackCheckLib.inf[LibraryClasses.X64] RegisterFilterLib|MdePkg/Library/RegisterFilterLibNull/RegisterFilterLibNull.inf[Components] HelloWorld.inf |
HelloWorld.inf
INF 文件是 edk2 app 的配置文件,其中
- [Defines] 该节定义了一些模块的基本信息
- BASE_NAME app 的名称
- FILE_GUID 可以通过命令 uuidgen 生成,UEFI 通过 GUID 来区分不同的模块
- MODULE_TYPE 这里填 UEFI_APPLICATION
- ENTRY_POINT c 代码中的主函数的名称
- [Sources] 模块的源代码,一般是.c,.h 文件
- [Packages] 需要使用到的包
- [LibraryClasses] 需要使用到的库
对于 INF 文件的完整解释,参考以下链接:

下面是定义的一个简单的模块
12345678910111213141516171819202122 | # Variables defined to be used during the build process[Defines] INF_VERSION = 1.25 BASE_NAME = HelloWorld FILE_GUID = 5455334b-dbd9-4f95-b6ed-5ae261a6a0c1 MODULE_TYPE = UEFI_APPLICATION VERSION_STRING = 1.0 ENTRY_POINT = UefiMain# Source code[Sources] HelloWorld.c# Required packages[Packages] MdePkg/MdePkg.dec # Contains Uefi and UefiLib# Required Libraries[LibraryClasses] UefiApplicationEntryPoint # Uefi application entry point UefiLib # UefiLib UefiBootServicesTableLib |
HelloWorld.c
12345678910 | EFI_STATUSEFIAPIUefiMain(IN EFI_HANDLE ImageHandle, IN EFI_SYSTEM_TABLE *SystemTable) { Print(L"Hello World!!!\n"); SystemTable->BootServices->Stall(10000000); return EFI_SUCCESS;} |
编译脚本
首先我们需要创建一个脚本,用于设置环境变量
12 | touch env.shchmod a+x env.sh |
env.sh
123456789101112131415161718192021222324252627 | # 项目名称,也是源代码的源文件目录export PROJ_NAME="HelloWorld"# dsc文件名export DSC_NAME="HelloWorld"# inf文件名export INF_NAME="HelloWorld"# 也是编译生成的*.efi的名字,在inf的BASE_NAME中定义export INF_BASE_NAME="HelloWorld"# UEFI 工作目录export UEFI_WORKSPACE="$HOME/UEFI"# EDK II 路径export EDK_PATH="$UEFI_WORKSPACE/edk2"# EDK II libc路径export EDK_LIBC_PATH="$UEFI_WORKSPACE/edk2-libc"# 应用代码路径export APP_PATH="$UEFI_WORKSPACE/code/$PROJ_NAME"# 构建输出目录export PKG_OUTPUT_DIR="$APP_PATH/Build"# 模拟器路径export EMULATOR_PATH="$EDK_PATH/Build/EmulatorX64/DEBUG_GCC5/X64"# 包路径设置,支持多个路径,用冒号分隔export PACKAGES_PATH="$EDK_PATH:$EDK_LIBC_PATH:$APP_PATH"# 指定 Python 解释器export PYTHON_COMMAND="/usr/bin/python3"# 确认设置完成echo "Environment variables for $PROJ_NAME project are configured." |
接下来写一个脚本实现编译我们的代码到 x64 目标平台
12 | touch build-x64.shchmod a+x build-x64.sh |
build-x64.sh
123456789101112131415161718192021 | set -etrap "Exiting" INT# environment variablessource env.shexport GCC5=/usr/bin/gcccd $EDK_PATHsource edksetup.shcd -# Building BaseToolsmake -C $EDK_PATH/BaseTools# 这里设置-b参数为DEBUG,需要部署时用RELEASE# -p --platform=# -m --module=# -a --arch=# -b --buildtarget=# -t --tagname=build -p $APP_PATH/$DSC_NAME.dsc -m $APP_PATH/$INF_NAME.inf -a X64 -t GCC5 -b DEBUG -D PKG_OUTPUT_DIR=$PKG_OUTPUT_DIR |
编译到 aarch64 平台同理
12 | touch build-aarch64.shchmod a+x build-aarch64.sh |
build-aarch64.sh
123456789101112131415161718 | set -etrap "Exiting" INT# environment variablessource env.shexport GCC5_AARCH64_PREFIX=$UEFI_WORKSPACE/toolchain/gcc-arm-8.2-2019.01-x86_64-aarch64-elf/bin/aarch64-elf-cd $EDK_PATHsource edksetup.shcd -# Building BaseToolsmake -C $EDK_PATH/BaseToolsbuild -p $APP_PATH/$DSC_NAME.dsc -m $APP_PATH/$INF_NAME.inf -a AARCH64 -t GCC5 -b DEBUG -D PKG_OUTPUT_DIR=$PKG_OUTPUT_DIR |
运行
Emulator 运行
最后我们写一个脚本在 edk2 自带的模拟器上运行一下, 注意这里需要你有 gui 环境, 如果是只有命令行则跳过这一步, 看下面一节用 qemu 运行
12 | touch run.shchmod a+x run.sh |
run.sh
12345678910111213141516171819 | set -etrap "Exiting" INTsource env.shexport GCC5=/usr/bin/gcc# Emulator编译,编译过一次就不用再编译了cd $EDK_PATHsource edksetup.shbuild -p $EDK_PATH/EmulatorPkg/EmulatorPkg.dsc -t GCC5 -a X64sudo mkdir -p $EMULATOR_PATH/UEFI_Disksudo cp $APP_PATH/Build/DEBUG_GCC5/X64/$INF_BASE_NAME.efi $EMULATOR_PATH/UEFI_Disk/cd $EMULATOR_PATH./Host |
qemu 运行
首先编译并安装 QEMU,这里我选择 8.1.5 的版本,如果达不到预期的效果可以考虑使用这个版本的 QEMU
123456789101112 | git clone https://gitlab.com/qemu-project/qemu.gitcd qemugit checkout stable-8.1sudo apt install python3-venv python3-pip python3-setuptools python3-sphinx ninja-build pkg-config libglib2.0-dev libpixman-1-dev# x86_64./configure --target-list=x86_64-softmmumake -j$(nproc)sudo make install# aarch64./configure --target-list=aarch64-softmmumake -j$(nproc)sudo make install |
接下来写脚本用 qemu 运行, 这里一些参数是为下一节用 gdb 调试程序用的, 但如果你只是想用 qemu 运行一下也不影响
12 | touch debug.shchmod a+x debug.sh |
debug-x64.sh
123456789101112131415161718192021222324252627282930313233343536373839 | set -etrap "Exiting" INT# environment variablessource env.shexport GCC5=/usr/bin/gcc# 编译过一次就不用再编译了cd $EDK_PATHsource edksetup.shbuild -a X64 -p OvmfPkg/OvmfPkgX64.dsc -t GCC5 -b DEBUG #-D SOURCE_DEBUG_ENABLEcd $APP_PATHmkdir -p _ovmf_dbgcd _ovmf_dbgrm -f debug.log# 与 Ubuntu 22.04 软件源默认的 QEMU 不兼容,需要升级 QEMU 版本到 v8.1.5cp $EDK_PATH/Build/OvmfX64/DEBUG_GCC5/FV/OVMF.fd ./mkdir -p UEFI_Diskcp $APP_PATH/Build/DEBUG_GCC5/X64/$INF_BASE_NAME.efi ./UEFI_Disk/cp $APP_PATH/Build/DEBUG_GCC5/X64/$INF_BASE_NAME.debug ./UEFI_Disk/# -s 启用 GDB 调试,默认监听在 127.0.0.1:1234# -bios OVMF.fd,指定 OVMF 固件文件,这是一个支持 UEFI 的 QEMU 固件。# -debugcon file:debug.log 将调试输出重定向到 debug.log 文件。# -global isa-debugcon.iobase=0x402 配置调试控制台的 I/O 基地址。qemu-system-x86_64 \-s \-bios OVMF.fd \-drive format=raw,file=fat:rw:UEFI_Disk/ \-net none \-debugcon file:debug.log \-global isa-debugcon.iobase=0x402 \-nographic |
这个脚本首先会编译 OVMF(Open Virtual Machine Firmware),OVMF 是一个基于 EDKII 的固件,可以在 qemu x86-64 虚拟机下运行。这使得调试和实验 UEFI 固件变得更加容易;无论是用于测试操作系统启动,还是使用(内置的)EFI shell。
OVMF 固件(用于 QEMU 的 UEFI 实现)被分为两个文件:
- OVMF_CODE.fd:包含实际的 UEFI 固件。
- OVMF_VARS.fd:作为一个“模板”用于模拟持久化的 NVRAM 存储。所有虚拟机实例可以共享来自 ovmf 包的系统范围内的只读 OVMF_CODE.fd 文件,但每个实例都需要一个私有的、可写的 OVMF_VARS.fd 副本。在 qemu 中,可以分别指定 OVMF_CODE.fd 和 OVMF_VARS.fd,也可以采用简化的写法:
123456789 | # 分别指定qemu-system-x86_64 -drive if=pflash,format=raw,readonly,file=Build/OvmfX64/RELEASE_GCC5/FV/OVMF_CODE.fd \ -drive if=pflash,format=raw,file=Build/OvmfX64/RELEASE_GCC5/FV/OVMF_VARS.fd \ -nographic \ -net none# 简化写法qemu-system-x86_64 -drive if=pflash,format=raw,file=Build/OvmfX64/RELEASE_GCC5/FV/OVMF.fd \ -nographic \ -net none |
运行 debug-x64.sh, 不出意外会出现如下界面, 即 UEFI 的 Shell
123456789101112 | UEFI Interactive Shell v2.2EDK IIUEFI v2.70 (EDK II, 0x00010000)Mapping table FS0: Alias(s):HD0a1:;BLK1: PciRoot(0x0)/Pci(0x1,0x1)/Ata(0x0)/HD(1,MBR,0xBE1AFDFA,0x3F,0xFBFC1) BLK0: Alias(s): PciRoot(0x0)/Pci(0x1,0x1)/Ata(0x0) BLK2: Alias(s): PciRoot(0x0)/Pci(0x1,0x1)/Ata(0x0)Press ESC in 2 seconds to skip startup.nsh or any other key to continue.Shell> |
在这个 shell 中输入 fs0:(注意这有一个英文冒号), 然后输入 HelloWorld.efi 运行我们的程序,预期输出"Hello World!!!"
在 Shell 中如果按 Backspace 没有反应,可以按 Ctrl+H 代替
12345678910111213141516171819202122 | UEFI Interactive Shell v2.2EDK IIUEFI v2.70 (EDK II, 0x00010000)Mapping table FS0: Alias(s):HD0a1:;BLK1: PciRoot(0x0)/Pci(0x1,0x1)/Ata(0x0)/HD(1,MBR,0xBE1AFDFA,0x3F,0xFBFC1) BLK0: Alias(s): PciRoot(0x0)/Pci(0x1,0x1)/Ata(0x0) BLK2: Alias(s): PciRoot(0x0)/Pci(0x1,0x1)/Ata(0x0)Press ESC in 2 seconds to skip startup.nsh or any other key to continue.Shell> fs0:FS0:\> lsDirectory of: FS0:\01/08/2025 22:23 82 gdb_commands.txt01/10/2025 20:22 184,544 HelloWorld.debug01/10/2025 20:22 5,760 HelloWorld.efi01/10/2025 12:22 1,391 NvVars 4 File(s) 191,777 bytes 0 Dir(s)FS0:\> HelloWorld.efiHello World!!! |
退出 QEMU 按 Ctrl+A,松开后再按 X
下面是 aarch64 版本的
debug-aarch64.sh
12345678910111213141516171819202122232425262728293031323334 | set -etrap "Exiting" INT# environment variablessource env.shexport GCC5_AARCH64_PREFIX=$UEFI_WORKSPACE/toolchain/gcc-arm-8.2-2019.01-x86_64-aarch64-elf/bin/aarch64-elf-# 编译过一次就不用再编译了cd $EDK_PATHsource edksetup.shbuild -a AARCH64 -p ArmVirtPkg/ArmVirtQemu.dsc -t GCC5 -b RELEASEcd $APP_PATH/$INF_NAMEmkdir -p _armvirt_dbgcd _armvirt_dbgrm -f debug.log# 与 Ubuntu 22.04 软件源默认的 QEMU 不兼容,需要升级 QEMU 版本到 v8.1.5cp $EDK_PATH/Build/ArmVirtQemu-AARCH64/RELEASE_GCC5/FV/QEMU_EFI.fd ./mkdir -p UEFI_Diskcp $APP_PATH/$INF_NAME/Build/DEBUG_GCC5/AARCH64/$INF_BASE_NAME.efi ./UEFI_Disk/cp $APP_PATH/$INF_NAME/Build/DEBUG_GCC5/AARCH64/$INF_BASE_NAME.debug ./UEFI_Disk/#qemu命令qemu-system-aarch64 \-machine virt,kernel_irqchip=on,gic-version=3 \-cpu cortex-a57 -m 1G \-drive format=raw,file=fat:rw:UEFI_Disk/ \-bios QEMU_EFI.fd \-net none \-nographic |
调试
gdb 调试 UEFI 程序稍稍有点麻烦, 但可以用脚本自动化一些操作, 总体流程如下:
- 运行 debug.sh, 然后进入 UEFI Shell 中运行一下代码(和上一小节用 qemu 运行一样的操作, 这里主要是为了在_ovmf_dbg/debug.log 中拿到 driver 启动的地址)
- 开另一个 terminal, 运行下面的脚本 addr.sh
- 在_ovmf_dbg/UEFI_Disk 目录下运行 gdb -x gdb_commands.txt
- 在 gdb 里面打断点, 比如 break UefiMain
- 添加 gdb 调试 target remote localhost:1234
- 运行,输入 c 跳到第一个断点位置
- 在 UEFI Shell 中运行你的代码
addr-x64.sh
123456789101112131415161718192021222324252627282930313233343536373839404142434445464748495051525354555657585960616263 | source env.shcd _ovmf_dbglogfile="debug.log"line=$(grep -oP "Loading driver at 0x[0-9a-fA-F]+ EntryPoint=0x[0-9a-fA-F]+ $INF_BASE_NAME\.efi" "$logfile" | tail -n 1)# 使用正则表达式提取两个地址if [[ $line =~ Loading\ driver\ at\ (0x[0-9a-fA-F]+)\ EntryPoint=(0x[0-9a-fA-F]+)\ $INF_BASE_NAME\.efi ]]; then address0="${BASH_REMATCH[1]}" address1="${BASH_REMATCH[2]}" echo "Loading driver at $address0" echo "EntryPoint=$address1"else echo "Error: No matching line found, maybe you need to run $INF_BASE_NAME in qemu first" exit 0ficd UEFI_Disk# 使用 objdump 获取文件头信息并提取 .text 和 .data 的 File offtext_offset=$(objdump -h "$INF_BASE_NAME.efi" | awk ' /\.text/ {print $6} # 提取 .text 的 File off')data_offset=$(objdump -h "$INF_BASE_NAME.efi" | awk ' /\.data/ {print $6} # 提取 .data 的 File off')# 输出提取的结果echo ".text file off: $text_offset"echo ".data file off: $data_offset"# 计算text_addr=$((0x${address0#0x} + 0x${text_offset}))data_addr=$((0x${address0#0x} + 0x${data_offset}))# 输出结果时使用16进制格式printf "text_addr: 0x%X data_addr: 0x%X\n" $text_addr $data_addrrm -rf gdb_commands.txt# 创建 gdb_commands.txt 文件并写入内容cat <<EOL > gdb_commands.txtfile ${INF_BASE_NAME}.efiadd-symbol-file ${INF_BASE_NAME}.debug 0x$(printf "%X" $text_addr) -s .data 0x$(printf "%X" $data_addr)EOL# 输出文件内容确认echo "gdb_commands.txt has been created with the following content:"printf "\n"cat gdb_commands.txtprintf "\n"echo "run the following command to debug"echo "cd _ovmf_dbg/UEFI_Disk"echo "gdb -x gdb_commands.txt"echo "break UefiMain"echo "target remote localhost:1234"echo "c" |
HelloStd
另一个例子, 使用 edk-libc 实现在 UEFI 中调用标准 c 库程序
可以复制 HelloWorld.dsc,在此基础上修改 GUID,然后记得修改 [Components] 为 HelloStd.inf,最后在 DSC 的 [LibraryClasses] 最后添加一行下面的代码
HelloStd.dsc
1 | !include StdLib/StdLib.inc |
接下来是 HelloStd.inf, 首先[Defines]中的 ENTRY_POINT 要改为 ShellCEntryLib, [Packages]中添加 StdLib/StdLib.dec 和 ShellPkg/ShellPkg.dec 这两个包, [LibraryClasses]中要去掉 UefiApplicationEntryPoint, 添加 LibC 和 LibStdio 这两个库, 下面是 HelloStd.inf 的声明
HelloStd.inf
12345678910111213141516171819202122232425 | # Variables defined to be used during the build process[Defines] INF_VERSION = 1.25 BASE_NAME = HelloStd FILE_GUID = d0956d2b-c033-45af-8ef2-76c9d30518ec MODULE_TYPE = UEFI_APPLICATION VERSION_STRING = 1.0 ENTRY_POINT = ShellCEntryLib# Source code[Sources] HelloStd.c# Required packages[Packages] MdePkg/MdePkg.dec # Contains Uefi and UefiLib StdLib/StdLib.dec ShellPkg/ShellPkg.dec# Required Libraries[LibraryClasses] # UefiApplicationEntryPoint # Uefi application entry point UefiLib # UefiLib LibC LibStdio |
接着我们就可以在 UEFI 中调用标准库程序了
HelloStd.c
123456789101112131415161718 | int main(IN int Argc, IN char **Argv) { EFI_TIME curTime; printf("HelloStd!!!\n"); gBS->Stall(2000); gRT->GetTime(&curTime, NULL); printf("Current Time: %d-%d-%d %02d:%02d:%02d\n", curTime.Year, curTime.Month, curTime.Day, curTime.Hour, curTime.Minute, curTime.Second); return 0;} |
接着更改 env.sh 中的 PROJ_NAME、DSC_NAME、INF_NAME、INF_BASE_NAME 即可编译,运行、调试等操作与 HelloWorld 中描述的相同